Template Sewing Machine: What It Is and How It Actually Works
19/08/2026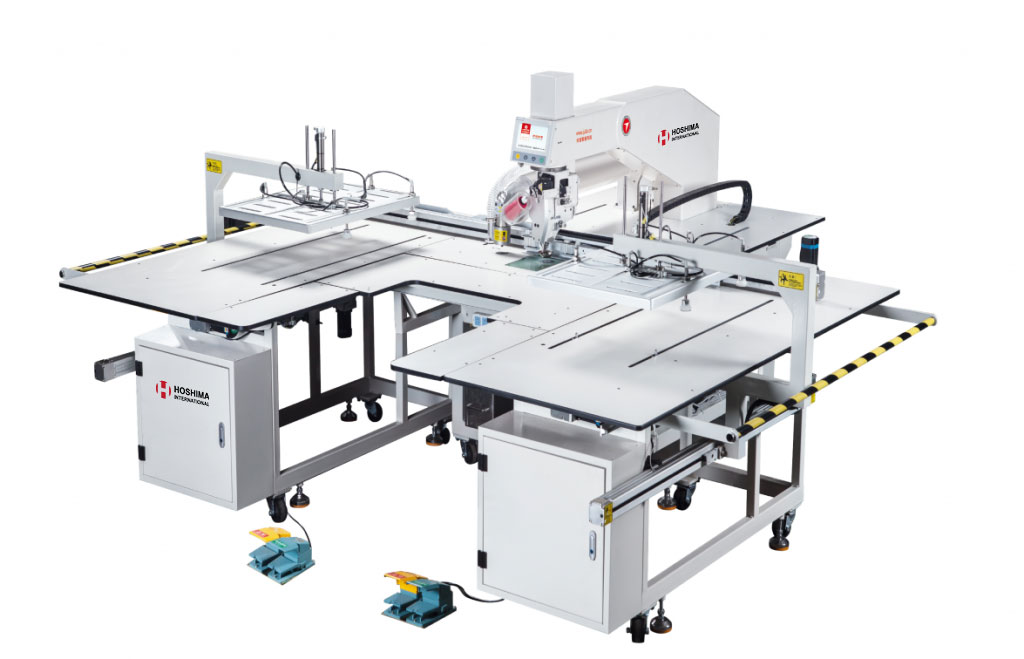
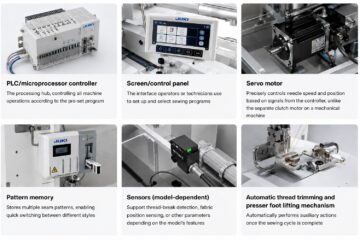
A template sewing machine is a programmable sewing machine (with a PLC controller storing a seam program, just like other programmable machines) fitted with an acrylic jig/fixture to precisely hold multiple fabric layers in place throughout processing. Some template machines also integrate a laser cutting head, cutting the component’s outline to a pre-programmed shape as part of the same workflow as the sewing operation.
⚠️ Important correction: the jig does not determine the seam shape, as is commonly assumed. The seam — whether long, curved, angular, or as complex as the quilting patterns on a padded jacket — is entirely determined by a seam design file created in dedicated pattern-design software, exported as a PLT or DXF file, and then loaded onto the machine, exactly the same mechanism as a standard programmable sewing machine. This is not direct on-machine PLC programming, as many assume; the machine’s control screen/panel is mainly used to select the loaded file, adjust speed, and monitor operation. The jig’s real role is to hold the fabric layers firmly in the correct position, preventing shifting while the machine executes the sewing (or laser cutting) path exactly as designed in the loaded file.
What the Jig/Template Actually Does in a Template Sewing Machine
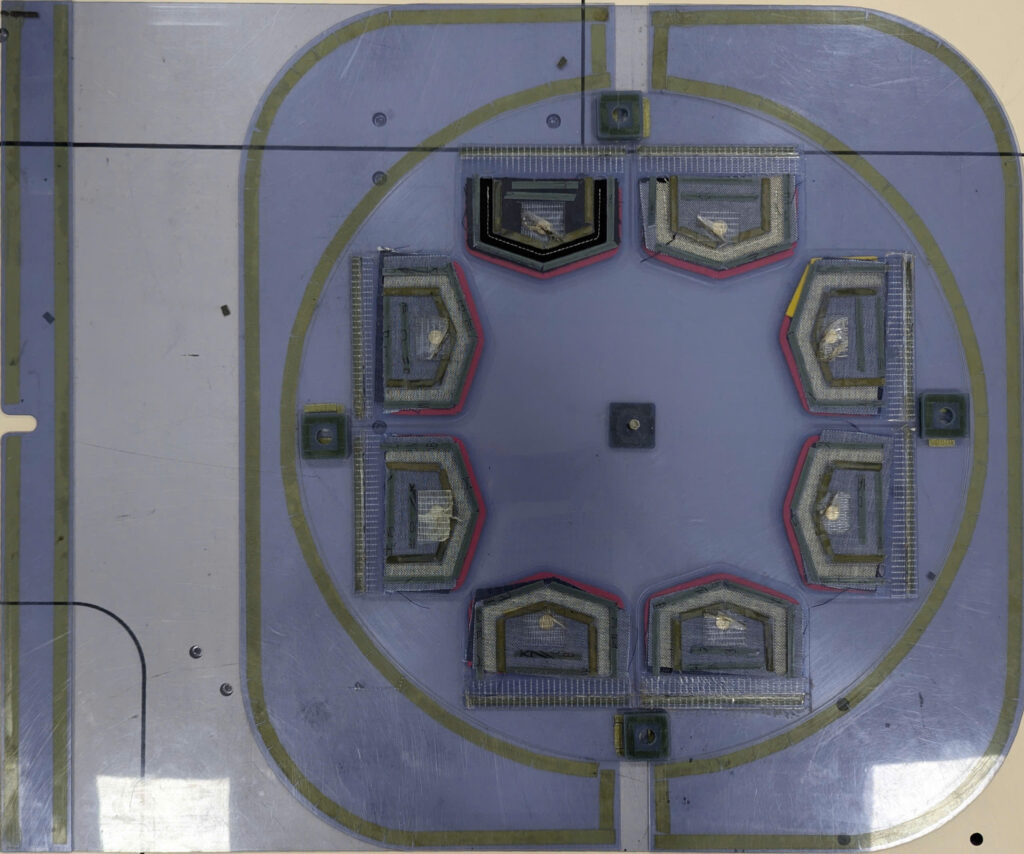
An acrylic jig serves three main functions:
- Holding fabric components firmly in the correct position: ensuring the fabric layers don’t shift during high-speed machine operation, so the pre-programmed seam is executed accurately at the correct location on the material.
- Stacking multiple material layers in the correct order: for multi-layer components (main fabric, lining, interlining…), the jig can be built with multiple layers (multi-layer) corresponding to each material-placement step in the process — operators place each layer of material into the correct jig level, following the defined sequence.
- Securing material during laser cutting (if applicable): for models with an integrated laser, the jig also keeps material stable so the laser head can precisely cut the outline according to the pre-programmed shape.
Components of a Template Sewing Machine System
| Component | Role |
|---|---|
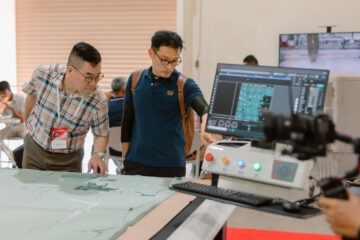
| Pattern design software (on a computer) | Where a technician designs the seam/cutting path, then exports it as a PLT or DXF file |
| Machine controller | Reads and executes the loaded PLT/DXF file, driving the machine head’s motion exactly per the path data |
| Programmable sewing head | Executes stitching exactly according to the seam data in the loaded file |
| Acrylic jig/fixture | Holds fabric components firmly in position, may be built with multiple layers depending on operation complexity |
| Laser cutting head (optional, on some models) | Cuts the component outline according to the cutting data in the loaded file, integrated within the same workflow as sewing |
Programming Workflow: From Design Software to Machine Operation
This is an important point to understand correctly, since it directly affects how a factory organizes staffing and pre-production setup:
- Design in dedicated software: a technician draws the seam/cutting path in dedicated pattern-design software (running on a computer, not on the small screen mounted on the sewing machine) — similar to how CAD pattern software (such as Lectra, Gerber, or Optitex) is used in a pattern room. This step requires software design skill, particularly for long seams with multiple curves or complex angles.
- Export as a PLT or DXF file: once the design is complete, the technician exports the seam/cutting path to a standard file format — PLT (a common plot format in the cutting/plotting industry) or DXF (the standard CAD drawing interchange format).
- Load the file onto the machine: the PLT/DXF file is transferred to the machine via USB, LAN, or a memory card, depending on the model.
- The machine reads and executes: the machine’s controller reads the path data in the file, driving the sewing head (and the laser head, if present) to move precisely along the designed path.
📌 Because it shares the PLT/DXF file format, this workflow is similar to that of fabric/pattern cutting machines (such as the Rapido Series or HSM Flatbed), which are also compatible with these standard CAD formats — allowing some factories to reuse or adapt design files already in their pattern room’s CAD system, rather than designing from scratch.
Real-World Example: Sewing a Shirt Collar with a Template Machine
To understand the mechanism clearly, consider the real process of sewing a 4-layer shirt collar (2 outer fabric layers + 2 interlining layers):
- The operator places 2 outer collar fabric pieces onto the jig.
- The machine laser-cuts according to the pre-programmed collar shape.
- The operator places 2 interlining pieces in between.
- The remaining outer collar layer is placed on top.
- The 4-layer stack is fed into the machine to sew the 3 edges according to the pre-programmed seam.
- The semi-finished piece (not yet turned right-side out) is handed off to the next operation.
This example clearly shows: the jig’s role is to hold the material layers in the correct position and sequence at each step, while both the laser cutting path and the 3-edge seam are executed according to the pre-loaded program on the controller — not determined by the jig’s physical shape.
Template Sewing Machine vs. Programmable Sewing Machine Without a Jig (also known as special purpose sewing machine)
| Criteria | Programmable machine (no jig) | Template (jig) sewing machine |
|---|---|---|
| How the seam is determined | Designed in dedicated software, exported as PLT/DXF, loaded onto the machine | Same software + PLT/DXF workflow — identical in this respect |
| Ability to hold multiple stacked material layers | Limited, depends on manual operator handling | High — the multi-layer jig holds each layer in the correct position |
| Integrated laser cutting in the same workflow | Typically not | Available on some models, combining cutting + sewing in one workflow |
| Best suited for | Simple seams, few material layers | Multi-layer components requiring precise assembly (collars, cuffs, pocket flaps…) |
| Supported seam complexity | Depends on programming capability — can be long/curved/angular | Equivalent — since it uses the same underlying PLC programming mechanism |
Pros and Cons of a Template Sewing Machine
Pros:
- Ensures material layers don’t shift throughout processing, allowing the pre-programmed seam/cutting path to be executed with absolute precision at the correct location.
- Handles complex multi-layer components well (such as shirt collars) that are difficult to stack accurately and stably by hand.
- Some models integrate laser cutting, condensing what would be 2 separate operations (cutting + sewing) into 1 continuous operation.
- Doesn’t require high operator skill — operators simply place each material layer into the correct jig level, following the sequence.
Cons:
- Requires cost to build a dedicated jig (potentially multi-layer) for each component type/operation.
- Requires dedicated seam/cutting programming for each design — similar to the programming cost of a standard programmable machine, but often more complex due to multi-layer, multi-edge seams.
- Less flexible when frequently switching component types, since the corresponding physical jig must be swapped.
Real-World Applications
- Sewing multi-layer components requiring precise assembly: shirt collars, cuffs, pocket flaps — where multiple fabric/interlining layers must be stacked in the correct order before edge-sewing.
- Complex, long, angular seams: quilting patterns on padded jackets or down jackets — long seams with multiple continuous curves and angles.
- Combining laser cutting + sewing in one workflow: for models with integrated laser, suited to components requiring precise edge cutting immediately before sewing (such as collars or facings).
Frequently Asked Questions
No. The seam — including long, curved, or complex angular seams — is entirely determined by a design file created in dedicated software, exported as PLT/DXF, and loaded onto the machine. The jig’s role is only to hold the fabric components firmly in the correct position while the machine executes the sewing or laser cutting exactly per the path data in the loaded file.
No. The seam/cutting design is done in dedicated software running on a computer, then exported as a PLT or DXF file before being loaded onto the machine for operation. The screen/control panel on the machine is mainly used to select the loaded file, adjust operating parameters (speed, stitch density), and monitor the process — not to design the seam from scratch.
For components made of multiple material layers (such as a shirt collar with outer fabric + interlining), a multi-layer jig helps operators place each material layer in the correct position, following the process sequence — ensuring the layers stay aligned when assembled before sewing.
No. Only some template machine models add a laser cutting head to cut the component outline to a pre-programmed shape within the same workflow as sewing. Many other models only sew, without laser cutting.
Contact us in Southeast Asia - South Asia:
- Singapore: 7 Temasek Boulevard, #43-01A Suntec Tower One, Singapore 038987.
- Vietnam - Philippines - Thailand - Cambodia: Unit 1, 3rd Floor, Building H, Street 17, Tan Thuan Export & Processing Zone, Tan Thuan Ward, HCMC, Vietnam.
- India: Sy. No. 23/8, Ground Floor, Masthappa Layout, Near Yashas Vidya Kendra School, Somashettyhalli, Chikkabanavara Post, Bangalore - 560090 , Karnataka, India.
- Bangladesh: Mizan House, 6th Floor, Flat 6/A, House 6, Road 2, Lane 1, Block G, Halishahar H/E, Chattogram, Bangladesh.
- Phone: (+84) 0983 309 910 (WhatsApp, WeChat, Zalo)
- Email: marketing@hoshima-int.com
- LinkedIn | Facebook | YouTube: Hoshima International